Media Player Classic Black Edition (MPC-BE) offers various features which are available during the playback of media file. It can accessed from Menu bar and from the context menu.
Some feature may be disabled depending on custom setting done by the user and the type of media file being played.

System Config:
- Software : MPC BE 1.5.5 x64
- Operating System : Windows 10 Pro x64
1. File Menu

Quick Open File : This option used to open locally stored media files playback in MPC-BE player. ( keyboard shortcut : Ctrl+Q).
Open File/URL : This option used to open locally stored media files and URL of media files. ( keyboard shortcut : Ctrl+O).
Selecting this option opens a new window named Open.

- User need to enter the Full path or URL of a media file in the text box labelled Open. Select OK button to start the playback.
- User can select browse( placed next to Open text box ) button to select single/multiple media file using File Explorer which will be loaded to the playlist. MPC-BE will start the playback of media files in the playlist.
- User can enter the Full path of audio file in the text box labelled Dub. This audio file will be loaded in MPC-BE for playback . This audio track is loaded in addition to the main media file which is opened in MPC-BE.
- User can select browse button( placed next to Dub text box ) to select single audio file using File Explorer which will be loaded in MPC-BE. This audio track is loaded in addition to the main media file which is opened in MPC-BE.
Add to playlist without opening :
- Checked : MPC-BE will add the selected media file(s) to the playlist. MPC-BE will not start playback of media files in the playlist.
- Unchecked : MPC-BE will add the selected media file(s) to the playlist and start playback of media files in the playlist.
Paste URL from clipboard :
- Checked : If the URL of media file is in clipboard it will be pasted in the text box labelled Open.
------------------------------------------------------------------------------------------------------------------------
Open DVD/Blu-ray : This option used to open DVD and Bluray storage media which contains media files.
Open Device : This option used to open media capture device.
Open Directory : This option used to open directory/folder which contains media files. All the supported media files found the selected directory will be added to the Playlist and media playback will begin
Open iso image : This option used to open ISO disc image file format which contains media files.
Recent Files : This menu contains the list recently played files.
Close : Selecting this option stops the media playback and closes the media file being played.
Save As : This option used to save a copy media file which is currently being played.

To take the screenshot and save it in the storage device, do the followings:
- Play the video file using MPC-BE.
- Pause at the frame of which you want to take screenshot.
- Select File > Save image. ( keyboard shortcut : Alt+I).
- Select a folder using File Explorer where the image will be stored.
- Select Save button.

Image file formats
MPC-BE supports three image formats which can be used to save the image file. User can select the image file format in the drop down menu labelled Save as type.
1. Bitmap : Bitmap image format stores the image with no compression. It is a lossless image format. Image quality is not lost. The output image File size will be highest compared to JPG and PNG image format. .

2. PNG : PNG image format stores file with compression. It uses lossless compression and output image does not loses quality. The image file size will be lower than BMP format and higher than JPG format.

3. JPG : JPEG image format uses lossy compression algorithm to compress the image data. The output image file loses Quality. The output Image File size will be lowest compared to BMP and PNG image format.
It offers Quality setting between 70% and 100%. User can set the quality of the output image. Selecting 70% will output least quality image and file size will be least. Selecting 100% will output highest quality image and File size will be highest. 90% Quality provides good balance between output image quality and output file size.
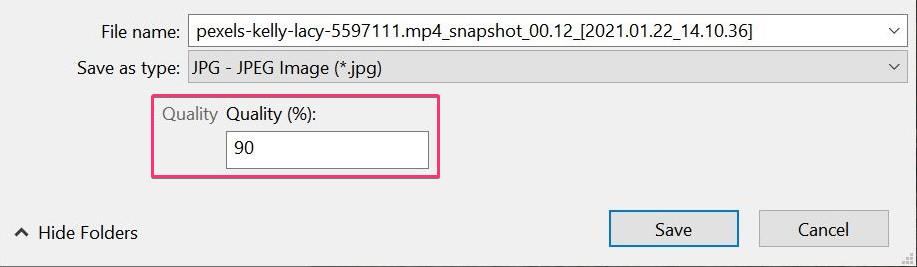
Image format File size comparison :
JPG with Quality 90% : Output image File size = 1728 KB = 1.74 MB
JPG with Quality 100% : Output image File size = 4854 KB = 4.73 MB
PNG with Compression 7: Output image File size = 10742 KB = 10.49 MB
BMP : Output image File size = 24,301 KB = 23.73 MB

---------------------------------------------------------------------------------------------------------------------------
Save Thumbnails : This option is used to save thumbnail sized screenshots of media file being played.
It will create grid of thumbnail size screenshots consisting rows and columns.
Saving thumbnails supports saving image file in three formats:
- JPG : JPEG image file format uses a lossy compression algorithm to compress the image data. It output image file size is lowest compared to PNG and BMP.
- PNG : PNG image file format is lossless compression algorithm to compress the image data. The output image file size is higher compared to PNG format and lower compared to BMP format.
- BMP : Bitmap image format does not use compression algorithm. The output image file size is higher compared to PNG format and BMP format.
To save the Thumbnail sized image, do the followings:
- Play the video file in MPC-BE player.
- Select File > Save Thumbnails.
- Select a folder using the File Explorer where the image will be stored.
- Edit the Filename of the image as required.
- Select the Type of output image from the drop down list labelled Save as type.
- Enter the number of rows of thumbnails in the text box labelled Layout Rows.
- Enter the number of columns of thumbnails in the text box labelled Layout Columns.
- Enter the width(in pixels) of the output image file in the text box labelled Image width Pixels.
- Select Save button.

Output thumbnail image file with 4 rows and 4 columns of thumbnails.

Output thumbnail image file Width : 1920

-----------------------------------------------------------------------------------------------------------------------

Load subtitles : This option can be used to load external subtitle file in the MPC-BE player for display on the screen.
Save subtitles : This option can be used to save text based subtitle file that has been loaded in MPC-BE player.
Subtitles Database > Search : Selecting this option will Web Browser and search the subtitles for media file currently being played.
Subtitles Database > Download : Selecting this option will open Online subtitle search window and search the subtitles for media file currently being
played. User will have option to select subtitle files which will be downloaded and loaded in MPC-BE for display.

Video: H.264/AVC 1920x1080 25fps [L-SMASH Video Handler - AVC Coding - MPEG4 Video (H264) (AVC (H.264), High Profile, Level 4.0, 1920x1080, 25.000 fps)]
Audio: AAC 48000Hz 2.0 chn [L-SMASH Audio Handler - MPEG-4 Audio (AAC, 48.0 kHz, 2.0 chn, 16 bit)]
MediaInfo tab

2. View Menu


Statistics : Selecting this option will show/hide the statistics of media file being played.
Status : Selecting this option will show/hide the MPC-BE status bar.
Playlist : Selecting this option will show/hide the MPC-BE playlist. (Keyboard Shorcut : Crtl+7)

View > Full Screen : Select this option zooms the MPC-BE window to fullscreen mode.
Zoom > 50% : Zoom to 50% of the size(resolution) of video File. (Keyboard shortcut : Alt + 1)
Zoom > 100% : Zoom to 100% of the size(resolution) of video File. (Keyboard shortcut : Alt + 2).
Zoom > 200% : Zoom to 200% of the size(resolution) of video File. (Keyboard shortcut : Alt + 3).
Zoom > Auto Fit : Zoom to (Auto fit preset) % of the size(resolution) of video File.(Keyboard shortcut : Alt + 4).
Language Menu : Here user can set the language of the MPC-BE interface.
Renderer Settings Menu
Tearing Test : It is used to test if the video playback is experiencing tearing or not.
Display Stats : It is used to show/hide the statistics related to video playback. (Keyboard shortcut : Ctrl + J)
Presentation > Exclusive fullscreen : It is used to Enable/Disable Exclusive fullscreen mode. It is used to display the MPC-BE video in exclusive mode while in Fullscreen mode. In Exclusive mode the monitor will not display anything from apps other than MPC-BE.
Reset to default renderer settings : Selecting this option will reset the custom settings done in View > Renderer Settings.

View > Video Frame Menu

Half Size : Selecting this option will keep the video frame size(resolution) fixed to 50% the original Size(resolution) of the Video File.
Normal Size : Selecting this option will keep the video frame size(resolution) fixed to 100% the original Size(resolution) of the Video File.
Double Size : Selecting this option will keep the video frame size(resolution) fixed to 200% the original Size(resolution) of the Video File.
Video frame > Stretch to Window : Selecting this option will stretch the playback video frame size(resolution) to the window of MPC-BE .
Touch Window from Inside : When this option is selected, the MPC-BE video frame will resize such that its frame always remain inside the MPC-BE window. No part of the video frame is cut out.
Touch Window from Outside : When this option
is selected, the MPC-BE video frame will resize such that one of the vertical or the horizontal edge of video frame will touch the MPC-BE window edge. Some part of the video frame is cut out of the view.
Override Aspect ratio > default: The playback video frame will use the default aspect ratio of the Video File.
Override Aspect ratio > 4:3 : The playback video frame will resize to 4:3 aspect ratio.
Override Aspect ratio > 5:4 : The playback video frame will resize to 5:4 aspect ratio.
Override Aspect ratio > 16:9 : The playback video frame will resize to 16:9 aspect ratio.
Correct Monitor/Desktop AR Diff : If it is Enabled then MPC-BE will correct the aspect ratio difference between the display Monitor and Windows OS Desktop.
View > Pan&Scan Menu

Increase Size : It will Increase the Size of the Video Frame relative to the MPC-BE Window.
Decrease Size : It will decrease the Size of the Video Frame relative to the MPC-BE Window.
Increase Width : It will Increase the Width of the Video Frame relative to the MPC-BE Window vertical edge.
Decrease Width : It will decrease the Width of the Video Frame relative to the MPC-BE Window vertical edge.
Increase Height : It will Increase only the Height of the Video Frame relative to the MPC-BE Window horizontal edge.
Decrease Height : It will decrease only the Height of the Video Frame relative to the MPC-BE Window horizontal edge.
Move Right : Selecting this option will move the Video Frame rightward relative to the MPC-BE Window.
Move Left : Selecting this option will move the Video Frame leftward relative to the MPC-BE Window.
Move Up : Selecting this option will move the Video Frame Upward relative to the MPC-BE Window.
Move Right : Selecting this option will move the Video Frame downward relative to the MPC-BE Window.
Center : Selecting this option will move the Video Frame to the center of MPC-BE Window.
Scale to 16:9 TV : Selecting this option will scale the Video Frame to 16: 9 aspect ratio.
Scale to Widescreen : Selecting this option will scale the Video Frame to Widescreen aspect ratio.
Scale to Ultra-Widescreen : Selecting this option will scale the Video Frame to Ultra-Widescreen ratio.
Edit : Using this option user can Add or Edit their own custom Pan&Scan presets.
Reset : Selecting this option will reset Pan&Scan setting to default.
View
> On Top Menu

Never : When this option is selected MPC-BE Window will not remain on top.
Always : When this option is selected MPC-BE Window will always remain on top of all other windows in the Desktop.
While Playing : When this option is selected, MPC-BE Window will remain on top of all other windows in the Desktop while playing media file.
Always : When this option is selected MPC-BE Window will remain on top of all other windows in the Desktop while playing Video File.
Options : Open MPC-BE Options window. (Keyboard Shortcut : O)
3. Play Menu

Play/Pause : Play/Pause the playback of Media File. (Keyboad Shortcut : Space)
Stop : Stop the playback of Media File. (Keyboad Shortcut : Period)
Frame Step : When this option is selected, MPC-BE will show to next frame of the Media File. Using this user can play the video frame by frame. (Keyboad Shortcut : Ctrl+Right)
Go To : Using this option user can jump to a specified time or frame number of the Media file.
1. Time Jump : The time jump format is (hh:mm:ss.ms) .
- hh : hours
- mm : minute
- ss: second
- ms : millisecond
Example :
- To jump to time 1 hour 36 minute and 40 second , timecode will be 01:36:40.000
- To jump to 20 mintue 14 second and 300 microsecond the timecode will be 20:14.300
To jump to a particular time :
- Enter the timecode in the text box labelled Time.
- Select Go button placed next to Time.
2. Frame Jump : The frame jump requires only the frame number. The time jump format is (frame number,frame rate)
Frame rate should not be be changed.
To jump to a particular frame:
- Enter the frame number in the text box labelled Frame.
- Select Go button placed next to Frame.

Increase Rate : Selecting this option will increase the speed of the media playback.
Decrease Rate : Selecting this option will decrease the speed of the media playback.
Reset Rate : Selecting this option will reset the speed of the playback to Normal.

Filters : This menu shows the list of filters currently being used by the MPC-BE for media playback. User can select a filter to see the details of the filter being used.

Audio : This menu is useful in Audio Track Selection during media playback which has multiple audio tracks loaded in MPC-BE. User can manually select a audio track in specific language from a list of multiple audio track.
Audio > Load Ext Audio : This option can be used to load a external Audio file for playback.
Play > Subtitle Menu

Enable :
- Checked : Subtitle will be shown in the video frame.
- Unchecked : Subtitle will not be shown in the video frame.
Subtitle > (List of subtitles) : This menu is useful in Subtitle Track Selection during media playback when there are multiple subtitle tracks loaded in MPC-BE player. User can manually select a subtitle track in specific language from a list of multiple subtitle for display on the video screen.
Load ext Subtitle : It is used to load external subtitle file in MPC-BE for playback
Advanced > Style : Selecting this option opens the subtitle Style window. User can do custom subtitle font style, border style, color and screen alignment settings for text based subtitles. The custom font setting done here will only be used during the playback of currently playing media file and it will reset to Default setting(Options > Subtitles > Default Style) when the currently played media file is closed.
Advanced > Reload : Selecting this option will reload the subtitle style setting in Play > Subtitle > Advanced > Style with the setting done in Options > Subtitles > Default Style.
Advanced > Default :
- Checked : MPC-BE will display the subtitle according to the setting done in Options > Subtitles >Default Style.
- Unchecked : MPC-BE will display the subtitle according to the setting done by the user in Play > Subtitle > Advanced > Style .
Advanced > Forced Only :
- Checked : MPC-BE will display subtitle track which has been attributed only as Forced.
- Unchecked : MPC-BE will display subtitle track with any attributed.

Stereoscopic subtitles > Don't use : If this option is selected MPC-BE will show a single subtitle track.
Stereoscopic subtitles > Side by Side : If this option is selected MPC-BE will show the same subtitle track placed side by side
Stereoscopic subtitles > Top and bottom : If this option is selected MPC-BE will show the same subtitle track placed top and bottom.
Play > After Playback Menu

Here user can select an option related to what will be done after MPC-BE has completed playing media files in the playlist according to the setting done in MPC-BE Option window in group box labelled Playback > Playback.
After playback options:
- Once
- Exit : Exit MPC-BE app.
- Stand By : Put computer in Stand by mode.
- Hibernate : Execute Hibernate command in the computer.
- Shutdown: Execute Shutdown command in the computer.
- Log Off : Execute Log OFF command in the computer.
- Lock : Lock the computer.
- Do nothing : Its the default setting which does nothing after playback ends.
- Everytime
- Exit : Exit MPC-BE app.
- Close File : Close the media file.
- Play next in the folder
: After the playback of media file in the playlist ends MPC-BE will
search for next media file in folder whose name comes just after the
name of the last file that has been played. If such media file is found
then it is played in MPC-BE.
- Play next in the folder (looped) : After
the playback of single media file in the playlist ends MPC-BE will
search for
next media file in folder whose name comes just after the name of the
last file that has been played. If such media file is found then it is
played in MPC-BE. After playing the last file(arranged by name) in the
folder, MPC-BE will again start playing the first file in the folder.
- No nothing : Its the default setting which does nothing after playback ends.
4. Navigate Menu
Navigate menu use changes according the type of media file being played.

Previous : If chapters exist in the currently playing media file then MPC-BE player will jump to the previous chapter. Otherwise MPC-BE will search for media file which lies just before the currently playing media file (Sorting Filename in ascending order) . If such media file is found in same folder then it will be played by MPC-BE player.
Next : If chapters exist in the currently playing media file then MPC-BE player will jump to the next chapter. Otherwise MPC-BE will search for media file which lies just after the currently playing media file(Sorting Filename in ascending order) . If such media file is found in same folder then it will be played by MPC-BE player.
Jump To : This menu shows the list of Chapters if chapter marks has been added to the Media File. Using chapter marks user can jump to a particular chapter from where MPC-BE will play the media file.
5. Favorites Menu
Favorite menu is useful in organizing users favorite media file. It stores a list of media files that can be quickly played using Favorite menu.

Add to Favorites : Using this option user can add the media file currently being played to the list of favorites. User will be asked to choose a name for the shortcut. User can enter a custom name for the shortcut which will be added to Favorite list.


Organize favorites : Selecting this option open Organize Favorites window. Here user can can do Edit,Move Up, Move Down and Delete operation on the favorite list.
Useful keyboard Shortcuts
Properties : Shift+F10
Play/Pause : Space
Audio Delay : Add
Audio Delay -10ms : Subtract
Jump Forward (medium) : Right Arrow
Jump Backward(medium) : Left Arrow
Jump Forward (key-frame) : Shift + Right Arrow
Jump Backward (key-frame) : Shift + Left Arrow
Next : Page Down
Previous : Page Up
Next File : Ctrl + Page Down
Previous File : Crtl + Page Up
View Minimal : 1
View Compact : 2
View Normal : 3
Volume Up : Up Arrow
Volume Down : Down Arrow
Volume Mute : Ctrl +M
Subtitle Delay - : F1
Subtitle Delay + : F2
Display Stats : Ctrl + J
Next Subtitle : S
Previous Subtitle : Shift + S